Create EMA Crossover Strategy Tutorial
Build and automate a simple EMA crossover strategy in TradingView with TradersPost. Perfect beginner guide to automated trading.

Marketing

The EMA crossover strategy represents one of the most straightforward paths to automated trading. This tutorial walks you through creating, configuring, and automating an EMA crossover system that executes trades automatically based on moving average signals.
Understanding EMA Crossover Logic
What EMA Crossovers Signal
Exponential Moving Averages respond more quickly to recent price changes than simple moving averages. When a faster EMA crosses above a slower EMA, it suggests upward momentum is building. When it crosses below, it indicates potential downward movement.
This crossover logic forms the foundation of countless trading strategies because it provides clear, objective signals that don't require interpretation. Either the crossover occurred or it didn't.
Choosing Your EMA Periods
Common EMA crossover combinations include 9/21, 12/26, or 2/9 periods. Shorter periods generate more frequent signals with more false positives. Longer periods produce fewer but potentially more reliable signals.
For this tutorial, we'll use a 2-period and 9-period EMA combination, which provides relatively frequent trading opportunities suitable for demonstrating automated execution.
Setting Up Indicators
Adding EMAs to Your Chart
In TradingView, search for "EMA" in the indicators menu and add two instances to your chart. Configure the first EMA to a 2-period length and the second to 9 periods.
Customize the visual appearance to make crossovers easy to identify. Use contrasting colors like blue and red, and adjust line thickness so the EMAs are clearly visible against your price candles.
Verifying Visual Signals
Before automation, manually observe a few crossover points on your chart. Ensure you understand what constitutes a valid crossover: the faster EMA must completely cross from one side of the slower EMA to the other.
Zooming into specific crossover points helps clarify exactly when the cross occurs relative to the candles. This understanding ensures your automated alerts trigger at the moments you expect.
Creating Buy Alert
Alert Configuration
Right-click on your chart and select "Create Alert". For the condition, choose your 2-period EMA, set it to "Crossing Up", and select the 9-period EMA as the second value.
This configuration triggers an alert every time the fast EMA crosses above the slow EMA, signaling a potential buy opportunity.
Frequency Settings
Set the alert frequency to "Once Per Bar Close". This prevents multiple alerts during a single bar and ensures alerts only trigger after the crossover is confirmed by the bar closing.
Set the expiration to "Open-ended" so the alert continues working indefinitely without requiring renewal.
Message Configuration
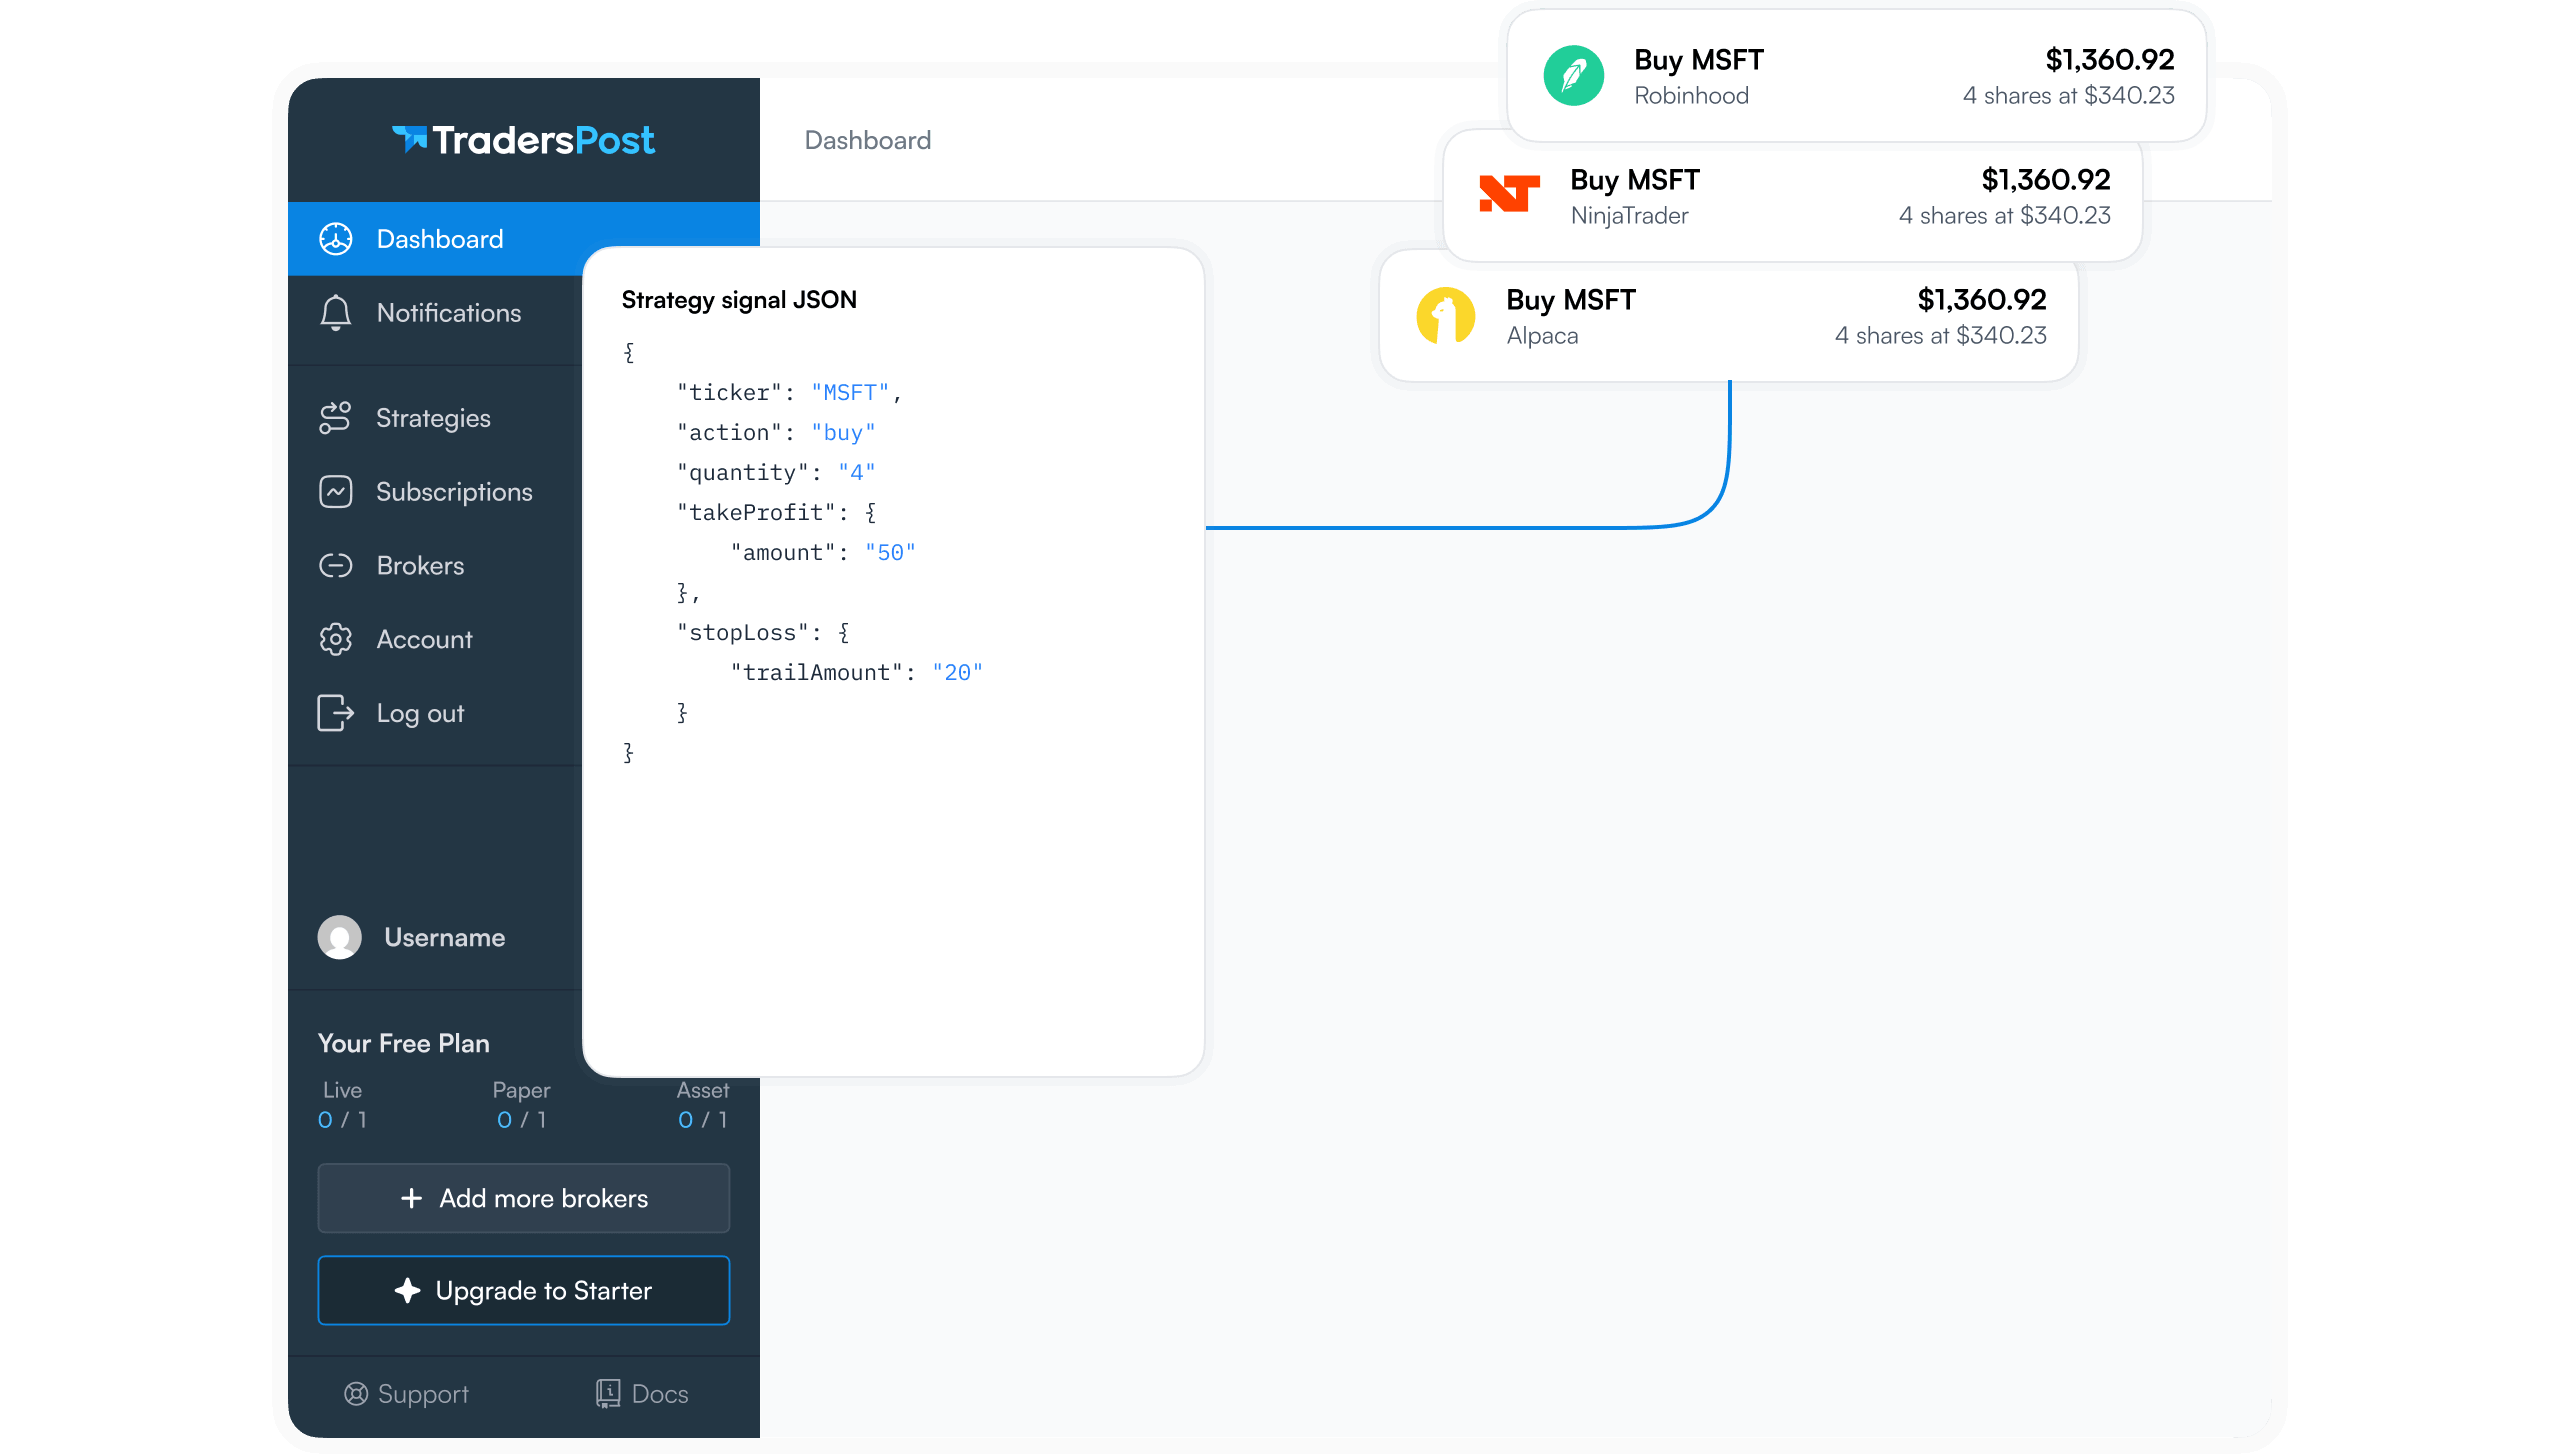
In the message field, enter the JSON payload that TradersPost expects:
` { "ticker": "{{ticker}}", "action": "buy" } `
This simple message tells TradersPost to buy the ticker from the chart that triggered the alert.
Webhook Setup
Getting Your Webhook URL
Log into TradersPost and navigate to your strategy's webhook page. Copy the unique webhook URL provided for your strategy. This URL is where TradingView will send alert messages.
Configuring Alert Delivery
In your TradingView alert settings, find the Notifications section. Paste your TradersPost webhook URL into the Webhook URL field.
Ensure other notification methods (email, SMS, etc.) are configured according to your preferences. You may want email notifications initially to confirm alerts are firing correctly.
Creating the Alert
Review all settings, then click "Create". Your buy alert is now active and will monitor your chart continuously for upward EMA crossovers.
Creating Sell Alert
Opposite Crossover Configuration
Create a second alert with the opposite condition: 2-period EMA "Crossing Down" the 9-period EMA. This detects when the fast EMA drops below the slow EMA, signaling a potential sell opportunity.
Use the same frequency settings (Once Per Bar Close) and expiration (Open-ended) as your buy alert for consistency.
Sell Message Format
Update the message to reflect the sell action:
` { "ticker": "{{ticker}}", "action": "sell" } `
Use the same webhook URL as your buy alert, directing both signals to your TradersPost strategy.
TradersPost Strategy Configuration
Strategy Setup
In TradersPost, create a strategy for your EMA crossover system. Select your target broker account and configure basic parameters like strategy name and description.
Subscription Configuration
Subscribe to your strategy by configuring:
- Position sizing: Fixed quantity or percentage of account
- Allowed directions: Both bullish and bearish
- Side swapping: Enabled to automatically reverse positions
- Auto-submit: Enabled to execute orders without manual approval
Order Type Selection
Choose market orders for immediate execution at current prices, or limit orders if you want to control execution prices. For EMA crossover systems, market orders typically work well since signals are meant to be acted upon immediately.
Understanding Execution Flow
From Signal to Execution
When an EMA crossover occurs at bar close, TradingView evaluates your alert condition. Finding it true, TradingView sends the configured message to your TradersPost webhook.
TradersPost receives the message, validates it against your strategy rules, calculates position size based on your settings, and submits the order to your broker.
Your broker receives the order and executes it according to its rules and current market conditions. The entire process typically completes in seconds.
Monitoring Execution
After setting up your automation, monitor the TradersPost dashboard to confirm signals arrive as expected. Check the signal log for each triggered alert and verify that orders execute correctly.
If orders are rejected, the dashboard provides detailed error messages explaining why, allowing you to adjust settings or troubleshoot configuration issues.
Position Management
Side Swapping Behavior
With side swapping enabled, your strategy automatically manages position transitions. When you're long and a sell signal arrives, TradersPost closes the long position and opens a short position in one action.
This automatic reversal means you're always in the market, either long or short, following the EMA crossover signals without requiring manual intervention.
Alternative: Exit to Flat
If you prefer not to always maintain a position, disable side swapping and modify your alert messages to explicitly exit positions:
` { "ticker": "{{ticker}}", "action": "exit", "sentiment": "flat" } `
This configuration closes positions without opening opposite positions, leaving you flat until the next entry signal.
Risk Management Considerations
Adding Stop Losses
While the basic EMA crossover system uses indicator signals for entries and exits, consider adding stop loss protection for unexpected market moves.
Configure stop losses in your TradersPost subscription settings as either fixed percentages or dollar amounts. This provides downside protection even if the EMA signals don't reverse quickly during adverse moves.
Position Sizing
Start with small position sizes as you test your automation. Even a well-designed strategy can behave unexpectedly when transitioning from manual to automated execution.
Gradually increase position sizes as you gain confidence in the system's behavior and verify that execution matches your expectations.
Testing and Validation
Paper Trading First
Always test new automated strategies using paper trading or simulated accounts before deploying real capital. This validates webhook connectivity, message formatting, and execution logic without financial risk.
Run paper trading for at least several crossover cycles to ensure the automation handles various market conditions correctly.
Reviewing Historical Performance
While past performance doesn't guarantee future results, reviewing how your EMA periods performed historically on your target instrument provides context for expectations.
Use TradingView's strategy tester to backtest your EMA periods on historical data, giving you insight into typical win rates, drawdowns, and performance characteristics.
Key Takeaways
EMA crossover automation demonstrates how simple trading concepts translate into fully automated systems. With just two indicators, two alerts, and basic TradersPost configuration, you create a system that monitors markets and executes trades continuously without manual intervention.
Start with this foundational approach, validate it through testing, and gradually enhance it with additional filters, risk management rules, or multi-timeframe confirmation. The simplicity of EMA crossovers makes them ideal for learning automation mechanics while still providing a legitimate trading approach.